Getting Started with Spec-Driven Development
Getting Started with Spec-Driven Development
Paul deGrandis
A new way of working
With increasing frequency, software engineers are required to design, build, and maintain “Always On; Never Fail” systems – systems that operate beyond 99.99% availability at enterprise scale and that impact the revenue of companies and the wellbeing of users.
You are one of these engineers.
The field of software engineering is rapidly evolving as the cost of producing code approaches $0 (we have access to infinite code), but the cost of building efficient, reliable, secure end-to-end systems is only starting to drop. Our practice is starting to look more like electrical or computer engineering – that is, closer to the practice of machine-checked specification. This guide exists to help you make the most of this opportunity and hone these skills. You will learn the basics of lightweight formal methods, spec-driven development, and how to gain efficiencies with coding agents.
The outcome will be impressive – we will be producing higher quality artifacts at faster rates, that are more robust, and that evolve better.
Pre-reading: To get a better sense of the landscape and the approach, please read these resources before continuing
- Spec-driven Development - Adoption at Enterprise Scale - provides an overview
- How AI redefines software engineering expertise - provides perspective
- Invariants: A better debugger? - establishes the focus on “invariants first”
The approach: A high-level view of working with coding agents
Our approach is going to center around invariants (what must be true for the system to be correct) and requirements (what must be true for the system to be successful, including quality attributes). We’ll be pulling our invariants through every phase of the software development life cycle, through every artifact produced, guiding our work. This perspective will put much more focus on critical thinking, deep analytical work, and writing.
Humans learn by embedding experiences in the brain. A unique learning process occurs when writing by hand that is distinct from typing and reading – it’s no surprise that sometimes all we want to do is draw a system diagram in our notebooks or on the whiteboard. Humanity has solved many near-impossible problems with simple pen and paper. Do you remember the last time a Datadog alarm went off at 2am, you saw the defect show up in the logs and you said to yourself, “Oh! I bet this happens because of the interaction between A and B. I can start bisecting the problem there!” – that intuition was possible because of the core learning and embedding that occurred while designing and implementing the system.
Our goal is to retain these kinds of learning processes and knowledge of our systems while leveraging the computer to amplify our thinking and work. To achieve this we’re going to use spec-driven development, let the coding agent/LLM do the typing, and confirm correctness using program verification tools and testing.
One artifact we’ll be producing along the way is a long-lived specification of our system- a living doc within our project that describes what the project is, how it works, and why. It will be the collection of decisions made and all system behaviors. This kind of documentation shares a lot of similarities with approaches like Knuth’s Literate Programming and other projects that maintain “books”/living docs along with their code. We’re going to use tooling to help guide and manage the specs automatically.
Software spends more than 80% of its life in maintenance and forward evolution – we need our use of agents and the artifacts we create to reduce the cost and burden of maintaining, operating, and evolving software.
From a high-level, these are the steps that will drive our Spec-Driven Development. This guide will explore each of them through a series of workshop exercises, giving you the tools and techniques to succeed:
- Draw an initial diagram of your system. Write what the goal is, why the system needs to be built, and list the initial requirements, quality attributes, and invariants of the system.
- Iteratively explore and probe: take the requirements and invariants and probe the coding agent to see how it interprets the requirements/invariants – start as broad and vague as possible to ensure creativity and get progressively more specific/focused. Take this feedback and refine the requirements/invariants. You might also want to explore the problem space yourself by sketching quickly through code or the REPL, or building a basic model with a tool like Alloy.
- Write/update your specifications and supporting projects docs. These will form the living documentation of your system. Cross-check and review the specs with a model. Keep the specs small and focused to control the context window of the LLM and to ensure the generated artifacts are comprehendable. We need to know what we’re building and how we need it built to drive the LLM to produce high-quality output.
- Instruct the coding agent to implement the specifications, documenting all pre-conditions, post-conditions, and invariants. Request that the agent enforces invariants and constraints with verification tools like OpenJML (sometimes this is done as a separate step after the initial implementation). Guide the agent to push all sources of non-determinism to the edges of the system implementation, keeping the core implementation functional in style and fully deterministic. The coding agent should also implement all unit tests, property-based tests, and concurrency tests (where applicable). The generated code should be small enough to fit in your head, if it’s larger or difficult to comprehend then decompose your current spec into two smaller specs.
- Use subagents and custom agent commands to ensure the code quality is high, the solution quality is high, and to ensure everything is correct. We’ll discuss each of these in more detail later in the guide.
- Examine/Review and adjust the code as needed. You will have a better perspective of well-designed abstractions in the code and how you expect to manage forward evolution within the system. Ensure all the invariants and specifications within the code are correct and make logical sense. Carefully review all the tests – coding agents can sometimes write tests that reinforce the implementation rather than ensure the correctness of the operations. Add any additional unit, property-based, or concurrency tests you think are necessary.
- Run the code formatter one more time, run a full “check” (compile, static analyzers, test suite, software verification). Complete and ‘archive’ the specification, updating the living documentation within the project.
This is the DESIRED Outcome (Draw/Invariants, Explore, Spec, Implement, Review with agents, Examine, Done). These steps describe one way of working, but not the only way of working. As you become more comfortable with the tooling, you can adapt the techniques as needed. There’s no time like the present, let’s get started!
The tools
First, we need a coding agent/harness:
- Claude Code - if you’re going to be using Anthropic as an LLM provider [docs]
- OpenCode - if you’re using Copilot, AWS Bedrock, or another LLM provider [docs]
We’re going to use OpenSpec [docs] to manage the development and evolution of our specifications. Our examples are going to be in Java (since it’s the closest common ground across all the engineers) and we’ll use OpenJML and other tools to verify specifications within our source code and tests. An appendix is provided for Rust as well (TBD, see the repo’s README).
For the initial setup, you can use the provided container (`orchard`) or perform the setup on your local machine – you only need to install the main coding agent and OpenSpec tooling. Follow the install instructions that make the most sense for your system/setup. As an example, here are the install instructions for OpenCode and OpenSpec using npm (assuming global npm installs are on your PATH):
npm install -g opencode-ai
npm install -g @fission-ai/openspec
If you’re using OpenCode, you’ll want to connect a provider (eg: like your Copilot subscription). Change to a temp/scratch directory in your terminal and execute the opencode command. Once opencode launches, type /connect (you’re going to be following the Copilot Provider instructions).
Next, clone the repository used for this workshop:
git clone git@github.com:adzerk/spec-driven-workshop.git
cd spec-driven-workshop
Safety first! Sandboxing
We need to control our agent’s access to sensitive data and limit the blast radius if the agent performs a destructive action. There are a number of acceptable options to sandbox the agent (VirtualBox VMs, microVMs on supported OSes, cgroups/Bubblewrap/Firejail on Linux) – choose the option that works best for your personal setup. The workshop provides an acceptable sandbox with Bubblewrap or Containers, but similar approaches can be taken with Docker Sandboxes, microVMs (even AI specific ones like boxlite, zerobox or OpenSandbox), or a similar technology specific to your OS (like macOS seatbelt or a wrapper like Buckle Up). Make sure your sandbox or container NEVER mounts /var (or else it can jailbreak) and never sees credentials stored in your home directory. See this OpenCode Issue for examples of various sandbox techniques. Claude Code ships with some sandboxing built in, but only around the bash tool (and limited scoping). When in doubt, make a dedicated VM for your agent (using something like VirtualBox or Vagrant) and let the agent work from there. The goal of the sandbox is strong isolation of the coding agent. Never put secrets, credentials, or passwords in the sandbox. Perform all git push/pull commands outside of the sandbox. The sandbox only exists for the agent to do typing.
Kicking the tires
Using your sandbox, start up your coding agent (for example, using the opencode command). You should be greeted by a screen that looks like this:
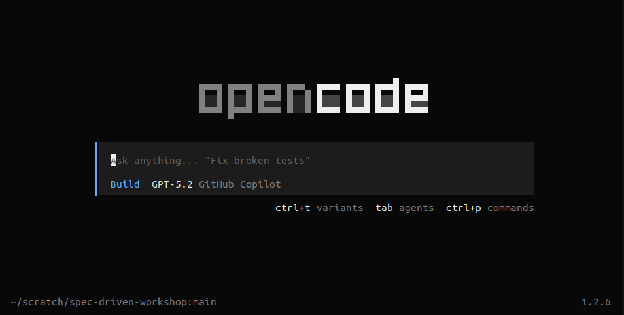
We can see the main mode of interaction is through agent prompting. We’re currently using our Build agent and as indicated in the TUI, hitting <tab> cycles through your main agents (by default, that’s Plan and Build). Hitting ctrl+p opens up a command palette. Hitting ctrl+t will cycle through the variants of your currently selected model if your model supports variants (eg: xhigh, high, medium, low). At the bottom left you’ll notice the current working directory and the active git branch. In the bottom right corner we see the version of OpenCode – OpenCode will automatically update in the background (this behavior can be configured).
Start by entering the / character in the prompt. You’ll notice that this is how commands can be autocompleted and executed. Along the way we’ll make custom commands, but let’s start by looking at a few commands you’ll use often. While typing a command you can hit <tab> to autocomplete that command.
/models- Select the model you want to use from the list of all the models you currently have configured. The arrow keys navigate/select and the list is fuzzy-filtered by typing. You can change your model throughout your working session, selecting the best model for the task you’re performing (or using different models to cross-check work performed by the agent).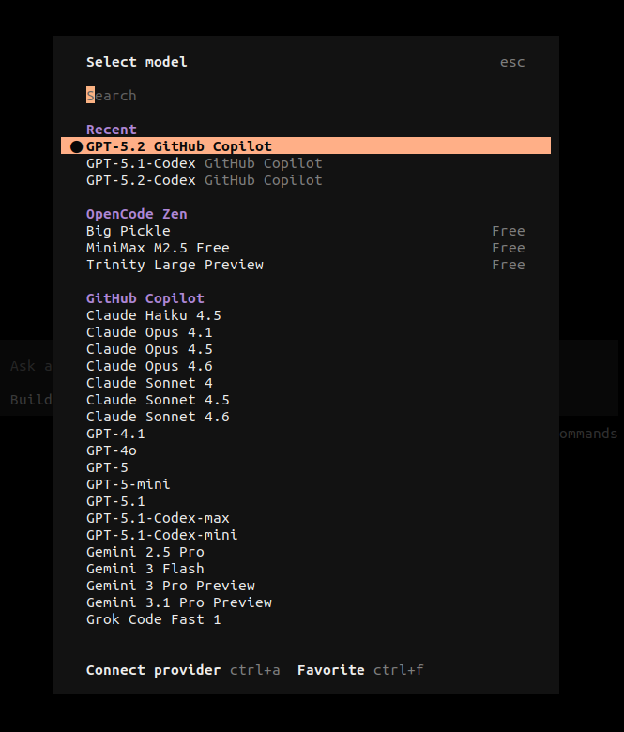
/sessions- Your interaction with the agents is saved in a Session. Using the sessions command lets you select between these sessions and delete old/unused sessions. You can always start a new session with the/newcommand. Later on we’ll see more advanced session operations./exit- This is how you quit
Important keys
The most important key to remember is Esc. The Esc key is used to cancel operations, exit menus, and most importantly, interrupt the agent/model from executing its current task. Without a doubt, you’re going to see the agent doing something stupid as you shout “no, no, no!” and you’ll be hammering Esc repeatedly. For those of you coming from Vim, you’ll feel right at home.
The @ key is used often within the prompt input. Using @ is how you delegate a prompt/input to a subagent and it’s also how you link files into your context. For example, in your current prompt, enter the following (and notice how autocomplete kicks in):
@explore explain how @Makefile works in this project
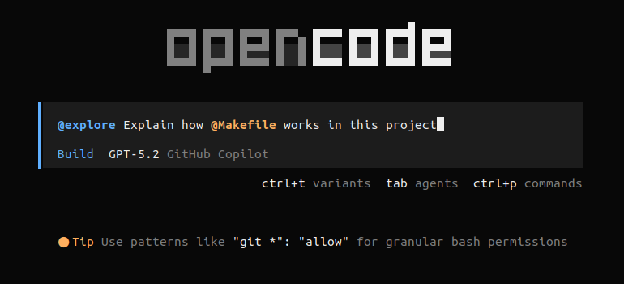
While the subagent is running, hit ctrl+x right to see the subagent’s work/thinking (and notice how OpenCode is telling you how to navigate back into the main agent’s session.
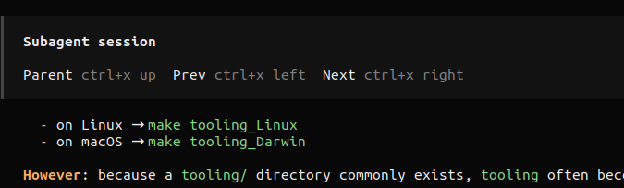
COOL! You just learned something very important about Agents and Subagents!
All of that context and work performed by subagent didn’t pollute your interaction (and main context window) with your main agent. Once the subagent completes, we see a summary inserted into the main agent’s context. This kind of context management will be very useful as we go forward.
Also noticed that OpenCode ships with LSP servers for many popular languages (just like an IDE). It uses these LSP integrations to help the LLM interact with your codebase.

Now that we’ve done some work, take a look at /sessions again.
Build vs Plan
From the OpenCode docs,
Agents are specialized AI assistants that can be configured for specific tasks and workflows. They allow you to create focused tools with custom prompts, models, and tool access. … [The Plan Agent] is a restricted agent designed for planning and analysis. We use a permission system to give you more control and prevent unintended changes. By default, all of the following are set to ask:
- file edits: All writes, patches, and edits
- bash: All bash commands
This agent is useful when you want the LLM to analyze code, suggest changes, or create plans without making any actual modifications to your codebase.
…
[The Build Agent] is the default primary agent with all tools enabled. This is the standard agent for development work where you need full access to file operations and system commands.
Most of our time will be spent with the Plan agent, building up the context, decomposing the problem, and creating a plan with distinct phases and acceptance criteria. You’ll likely want to use another model (while still using the Plan agent) to review and cross-check that plan. We’ll then use the Build agent to execute that plan, steering the Build agent as needed (by updating the original plan and making small corrections). Later in the guide, we’ll expand on the way of working, but this general approach of “focus and iterate on the Plan, then Build” is a core pillar.
The workshop repo and supporting our agents
Above in “The tools” section, we cloned the workshop repository. Take a moment to read through the README of the project if you haven’t done so already. You can use the orchard container or a local setup. If you use a local setup, make sure you have the pre-reqs installed and that you run the necessary initial commands (with a strong internet connection):
make tooling; make check
We need to have high confidence and assurance in the artifacts produced by our coding agents and also support the agents with as much automated, directed feedback as possible. We’re going to achieve that through a number of tools and techniques:
- Strong compilers with compile-time warnings and messages to guide implementation
- Test suites that cover basic invariant checks with unit tests, property-based testing of deeper behaviors and state machines, and concurrency testing
- Static analyzers to catch defects, problematic coding patterns, security issues, etc.
- Code formatters to keep syntax uniform across the code base
- Extended checking with code verifiers and similar tools
- Subagents for code-review, testing, and code optimization passes (we’ll cover these in the workshop)
Regardless of the language and runtime of your project, you should have support for each of these critical areas.
Eventually we’ll expand on this list, giving our agents full visibility into centralized logs, system metrics, network traces, and more. Our goal is to maximize the input signals and minimize noise.
Let’s turn our attention to the workshop repo for a moment. When we run make check, the code is formatted, compiled, the full test suite runs, and all of the static analyzers are executed. Try it now (if you haven’t done so already) – you’ll see everything passes!
But looks are deceiving. Let’s run make check-jml which will run all the steps from before, but also run the static verifier over the code. We can see a few issues are flagged even though the specifications in the code aren’t very precise. We first look for the output related to our increasingSum method and see the result was INVALID:

We can see that there are possible integer overflow bugs that we haven’t accounted for:

We can see a specific post-condition of the method won’t hold in certain cases:

And we can see that there’s a specific call of this method where the pre-condition is violated:

With this knowledge we could go into the implementation of the incrementSum method, make the code more defensive with an if-statement/switch-expression that ensures correct execution, and clean up the invalid calls. But more importantly, we could use this feedback to guide the agent to make those corrections. We’ll see in the workshop that even requesting the agent to document the pre-conditions, post-conditions, and invariants helps produce better artifacts that contain defensive coding.
Wrapping up
In this section, we got an introduction to coding with an agent and the important controls available to us. From here, you should take some time to read the OpenCode Getting Started guide as well as the OpenSpec Getting Started guide to get a sense of the tools we’re going to be using. The OpenCode guide also includes useful examples and prompts you can adapt to your own work. You might want to configure OpenCode to better match your preferences – the config file should be found at (or created at): ~/.config/opencode/opencode.json We’ll be making changes to the config file throughout the workshop.
Next we’ll see how to work in the spec-driven way, as well as see how we’ll maintain quality and assurance.
The spec-driven approach in detail
In this section we’ll get hands-on with spec-driven development as we use the coding agent to build out a simple simulation system and web service. There are some important things to note upfront though- LLMs are statistical models that calculate likelihood of different tokens (output). Our approach will help narrow that a bit, but different output across models and sessions is expected. You will notice that the way of working described in this doc will likely need to be tweaked based on the model you’re using - some techniques will work well on one model that won’t work on others. As an example, this guide will suggest controlling and focusing the LLM’s context window while the agent works through specs, but that is less important on the latest generation of models. What this guide will provide is one way of working that should perform well on most setups, and again, you should adapt it to your own setup, preferences, and needs.
As mentioned earlier, we’re going to focus and iterate with the Plan agent then dispatch the plan and specs to the Build agent. To make that a bit easier, let’s make the Plan agent our default agent when we start OpenCode and turn off autoupdate (you can re-enable it after the workshop). Edit the configuration file at ~/.config/opencode/opencode.json
{
 "$schema": "https://opencode.ai/config.json",
 "autoupdate": false,
 "default_agent": "plan"
}
The project
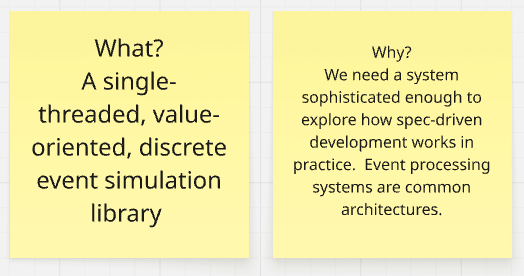
To get started, we’re going to build a simple discrete event simulation library that is single-threaded, value-oriented, and functional in design – we’ll center the implementation on state machines. This is a useful project to build because it’s similar to many production systems we’re asked to design and implement:
- A transaction processing system like Kevel’s internal AdMachine
- A message processing system like the event systems or Kevel Audience
- An event scheduling and execution system like Kevel’s Scheduler
- The core of most web libraries (like Pedestal)
- An event-loop system (like Node.js, a game engine, or anything similar)
Lightweight simulation systems are also useful to test design ideas. We can see how probabilistic systems will play out with a series of events (that might interleave) – this is something we can use after the lab exercises in our day-to-day work. This project is challenging enough that it’s not trivial and small enough to practice with spec-driven development. After we implement the core library, we’ll build a JSON-based web API around it, ensuring we keep the concurrency constraint in place. Almost every system we develop today has some component of a JSON-based web service to it, so it is useful to practice doing that with the agent. Additionally, we can see how the agent navigates the concurrency challenges (as well as how concurrency testing helps us gain the confidence and assurance we need). We’ll use the agent to generate unit tests, property-based tests, and pre/post conditions in the code. Along the way, you can compare your results to mine (which are “checkpointed” on the branches)
When you see prompt examples, type them in, do not copy and paste. Make adjustments as needed.
1. Let’s draw something
I cannot emphasize this enough - this is the most important step in the entire process.
Working through the base requirements, critical quality attributes, and fundamental invariants provides the foundation for everything else we’re going to do. We need to know what we’re building before we can expect agents to build it. Deeply knowing the core invariants will make debugging a system seem trivial (and will make understanding and managing failure modes within the code much simpler) – if a bug happens in the system we know some invariant wasn’t enforced or there’s a new invariant we missed. Collecting this information and drawing a simple system diagram will also make forward evolution of the system easier to manage.
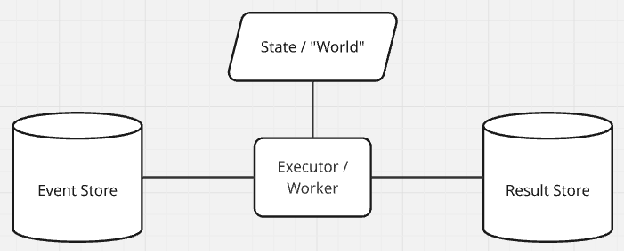
Let’s start with a simple “box-and-line” drawing of the discrete event simulation (DES) system and we’ll explore how to analyze it to extract invariants. We know we need something to store the events, something to execute the events, and some way to accumulate state as the execution runs. Let’s also write down what we’re building, why we’re building it (what problem are you solving; what job needs to be done; what is the core motivation for making this investment), and any requirements we know we have. Try it yourself before reading further.

Let’s start with the “Event Store” – what must be true for the event store to be correct? Don’t hesitate, just start writing everything down and smooth it out later. Here’s my initial list:
- It needs to store events
- Events have an order (simulation time) and the event store must keep events stored in order
- DES systems usually store events in some kind of a heap, like a min-heap (or any variant, like a priority queue).
- What happens when two events have the same time?
- This won’t be allowed in our system, every event must have a unique time, so we have a total order of events.
- It must be possible to retrieve the “next” event from the store, as well as inspect (but not remove) the “next” event.
- There must be some notion of “now” – a barrier that establishes the valid time limit of events. All events within the event store will be at time “now” or greater than time “now” (time is monotonic). This is usually called the Clock or ‘tick’ of an event processing system.
- It must be possible to insert events into the event store. You can only insert at time now+1.
This is a great start! If this represents everything necessary for correct operation, then we already know the complete set of error modes (anything/everything not in that list). If our code strongly rejects all operations that don’t match our invariants, the system should remain in a known-good state.
But what does our event store actually store? Let’s write down some core requirements (including all of our quality attributes) and think about their consequences to help answer this question.
- Single-threaded; This implies only a single Executor/Worker running at one time, with access to a single “World” or simulation State.
- Value-oriented; This implies that the system is going to be functional in nature. The “World” is immutable (value-oriented). At a minimum, the Executor/Worker must take a “World” and produce a new “World” for each simulation action / simulation step.
- Java 21; This implies the language features we have access to: Record types, pattern-matching, sum types/sealed interfaces, local type inference, etc. We can also use language/runtime features to help enforce correctness for our “single-threaded” requirement.
- Deterministic core; In combination with our value-oriented approach, this implies the main implementation will be constructed with pure functions/methods. Sources of non-determinism (mainly time, I/O, and conditional behavior) will be pushed to the edges of our system and passed in as arguments to the deterministic core.
- State machine construction; In combination with all the other requirements, this implies a very clean “protocol” for how an Executor/Worker claims an action/event, executes it, captures the result (an immutable value, the new “World”), as well as internal system updates like the “clock”.
Whoa! Wait a minute, that’s it! At a minimum, our Event Store must store some kind of pure function that takes a “World” argument and returns a “World” value. We probably also need a way for the simulation to “evolve” (where one action leads to another action in the simulation) – so our pure function should take a “World” argument and return a list of new Events/functions to insert into the Event Store, as well as a new “World” value.
We should make the World something easy to work with and extensible – an associative data structure will work well (eg: a simple Map). We have a few options for how to make the system value-oriented (immutable data structures, Copy-on-write data structures, or exclusive mutability) – we’ll wait to see how the system comes together before deciding. We’re ignoring quality attributes for now (but for production systems, these are almost more important than the core functional requirements).
Let’s continue with our analysis; boxes first, then lines. What must be true for the Executor/Worker to be correct? No bad ideas, just start writing:
- The Worker only accepts functions that take a World argument and return a list of new Events and a new World value.
- The Worker has access to (and perhaps maintains) the current, immutable World
- The Worker is defensive and traps all exceptions from the function, returning the current World it referenced / it was passed if a failure happens. Failed events are dropped, there is no retry mechanism and they are not reinserted into the Event Store (the current World remains unchanged, but the clock advances). Events/functions are responsible for performing their own error handling internal to their action.
- Events/functions cannot be cancelled once they begin running (and this implies they also cannot be interrupted)
- In a production environment, we’d likely want to make the tasks cancellable
After we have invariants for all the “boxes” we can start to focus on the lines. These relationships between boxes are sometimes referred to as Interaction Protocols. What is required and ensured/promised by both entities at each side of this relationship, for the system to remain correct?
- The event store ensures it only contains correct/valid Events/Functions, or is empty.
- An Executor/Worker can peek at the next event or take the next event. When an event is taken from the Event Store, that Event’s ownership is transferred to the Executor/Worker.
- An Executor/Worker always ensures it produces a World value and a list of new Events for the Event Store. The Executor/Workers ensures the list only contains correct/valid Events/Functions, or is empty.
- The Executor/Worker must return from processing an event before requesting a new event. That is, the system is single-threaded and only one event can be processed at a time.
That seems like a pretty good start! We now have an initial idea of what a correct system should look like and how it should work. Whenever we learn something new about our system, we’ll return to update our diagram and refine the invariants/requirements. This will always be the foundation of our system understanding as long as the system remains operational.
2. Exploration and probing
Let’s explore our initial system design to see if we uncover any more requirements or invariants. We also want to see how the coding agent will interpret our initial design and if we need to refine the language or details. Along the way we’ll learn some useful prompting techniques when working with the coding agent.
Every aspect of your interaction within a session will be part of the LLM’s context. If you feel like you aren’t getting the results you want or want to go down a new path, you should create a /new session. You can jump back to old messages within your current session using /timeline, and optionally revert that interaction or fork from there into a new session. As you’re working, you may realize you have another question or an idea, but you want to keep the current session focused on the current task – you can /fork to create a new session to pursue the side-quest. You are now a session wizard, let’s start. Create a new branch in the repo for your work with:
git checkout -b des
Start as vague and open-ended as possible:
Design and plan a simple discrete event simulation library in Java 21. The core implementation should be in a functional style. The implementation must be single-threaded. Explicitly document all pre-conditions, post-conditions, and invariants.
This minimal structure is good enough to see the general direction the agent will take. Always include the line about documenting pre/post-conditions and invariants – this will help guide the agent to correct logical conclusions and lead to a more successful implementation. It also makes it a bit easier to evaluate as a human. You might also consider adding, “Ask me clarifying questions” to your initial prompt. Sometimes that can accelerate finding new invariants you missed.
You can see the result of my initial prompt in the git repo (I left the tool-calls). Already we can see some interesting and informative results. The agent identified multiple ways to achieve our functional and value-oriented design requirements, suggested an alternative to a total-order where we can have events scheduled for the same time, it also designed the interface with a peek operation (but notice it used Optional to avoid null, something I missed in the initial invariants), it made the simulation state a generic (which is a bit more flexible than forcing Map), and I like the design of an explicit, immutable StepResult. It also gives me an idea- I’d like to see the sequence of all StepResults, which would make post analysis a bit easier as well as writing some tests (I understand this is going to put strain on the GC and total memory used).
Update the initial diagram, invariants, and requirements with anything you’ve learned.
Let’s update this initial plan with any other ideas we have and then see how the Build agent would implement it – we’re just sketching around right now. We can write the plan to a markdown file with the Build agent:
Condense this plan including all invariants, pre-conditions, and post-conditions into a Markdown file called plan.md
I also recommend sending a prompt similar to this one:
Capture the entire plan including implementation guidance and all constraints into a Markdown file called long_plan.md
Review both of those documents in your text editor and ensure they are correct.
At this point you’ll notice that we’ve used up some amount of the context (look in top right of the screen, in my case I’ve used up 20% of the context). Starting a new session (with a clean context) and seeding the new session with a markdown file is one strategy you can use to control and reset the context (and this is often helpful when switching from Plan to an extensive Build session). Another option is auto-compact – Most coding agents now will automatically compact the context for you, allowing you to continue working without any issue. Different models have different sensitivity to automatic compaction.
Finally, you can always manually compact the context for the current session with the /compact command.
Try the /compact command now and see the output (as well as the impact on your context usage). You may have to rebuild up some important (but missing) context after compaction.
Using the Build agent, switch your model to your preferred code-specific model (using the /models command). Let’s just see what this implementation would look like – code is free/infinite, so consider this like an instantaneous coding spike. Our goal here is to see if it triggers any ideas for us or highlights any requirements or invariants we’re missing. I’m going to remain in the same session and kick off the Build agent with this prompt:
Implement the plan described in this session, @plan.md and further in @long\_plan.md . Document all pre-conditions, post-conditions, and invariants. Follow the validation plan using JUnit 5 and jqwik.
This is an important technique you can use with your coding agent – whenever you want to tightly control the context and focus of the agent, you can capture the relevant information within a collection of markdown files and reference them in your prompt. For example, you might want to grab relevant sections of a research paper or product brief and copy them into a markdown file to get them into your context.
While we wait for the implementation, here are some other prompting techniques:
- LLMs love patterns. When you want to focus an answer or implementation, try including input/output pairs and examples in your prompt. You can also use this to copy/clone a coding pattern that already exists in your repo/project as well.
- The LLM is aware of token probabilities and you can use this to drive more creativity in the answers with verbalized sampling.
- Prompting techniques like chain-of-thought are very popular (helping the LLM/agent decompose a task/question to get a correct result), but better results can often be found using chain-of-code (prompting the agent to build a simple program to reason through and solve the problem). This can be easily combined with the first technique – input/output pairs or examples.
- Self-reflection is a super power. Asking the agent to explain changes back to you or to review work can drive higher quality outputs (and can help with your own comprehension about the work being done). This can be combined with a variant of “chain-of-code”, eg: “Explain why the claims are true by tracing the logic through the code. Write a unit test to defend the claim”
Try things out and you’ll quickly find approaches that work well for you and your setup. When you find a prompt or technique that you use often, you can turn it into a custom command within the coding agent (commands are just markdown docs with special formatting that get inserted into the context). For example, you might want to turn your standard Planning prompt into a custom command.
Ok back to our explorative implementation (mine took about three minutes to complete).
Out of habit, I always run make check before diving into the code to see if there are any obvious errors. In my case, there are unused variables within the test files, but otherwise everything looks good. You can check the implementation and tests against the original invariants we created earlier (as well as what was documented in the plan files). You can see my code/agent sketch result here. I also asked the model to “Create a simple box-and-line architecture diagram of the discrete event simulation library. Save the diagram as a png file” and you can see that result here – Every custom tool, every custom artifact/diagram is essentially free now; produce anything/everything that improves assurance and understanding.
We can also see how well the coding agent can document the invariants with JML specs – this step is totally optional but if you do it, I recommend a new session (and maybe using the openjml skill); It’s likely you’ll have to interrupt the agent from running with Esc or steering “Stop!” message, if it starts to go off the rails. If you want, you can try a prompt like this:
Update the code to include JML specs for all pre-conditions, post-conditions, and invariants. The JML specs will be checked by OpenJML using the \`make check-jml-only\` command. Only focus on code in @src/main/com/kevel/des . Some Invalid specifications are ok but there must not be any errors. Ask before modifying any existing code, and show that it’s necessary because of an invalid specification.
This entire spike took about 50K tokens (with an additional 80K tokens on the JML specs) and about 20 minutes of time including the initial drawing and invariants.
Now create a new git branch (from the main branch) and a new session in the coding agent. We’re going to repeat the same steps but get more specific. You might try prompting that you want it to use state machines as a guiding pattern, emphasize the importance of pure functions and a deterministic implementation, that the test suite should include domain examples (like a network packet simulator or a bank queue), or that it should use specific Java features (like sealed interfaces, records, switch expressions) – in general, pull more invariants into the prompt. Iterate with the Plan agent until you see the exact plan you want. Try using different models to cross-check or review the plans that get generated. Once you have a compelling plan, dispatch to the build agent to see the implementation. Update and refine the invariants and requirements as you learn. This is the action of creating 10s/100s of prototypes in minutes, a new superpower we have. The interaction with the coding agent should feel like “sparring” through possible decisions and designs.
And always save the best plan you generated to plan.md. It’s useful to reference and use to establish the ideal context for your current feature/task.
3. Producing the Specs
We’ve written and refined our core invariants and requirements, now we have the knowledge to succeed with our Specs. We’re going to be using OpenSpec (version 1.2.0 or better) to manage the workflow and our spec artifacts. It’s possible to customize OpenSpec to follow any workflow you want for your team or project, but for our workshop, we’re only going to use the core/default workflow.
In a terminal at the base of the project repo, run openspec init and follow the directions for your setup. This will create the openspec directory and the basic commands for using OpenSpec within your coding agent (you’ll see there’s a .opencode or .claude directory now). You can further customize your installation/workflow with openspec config profile (see the docs if you’re interested).
Start up your coding agent in Plan mode and enter the /opsx-explore command (with no other arguments):

By default, the coding agent should spit the contents of the command into the context:
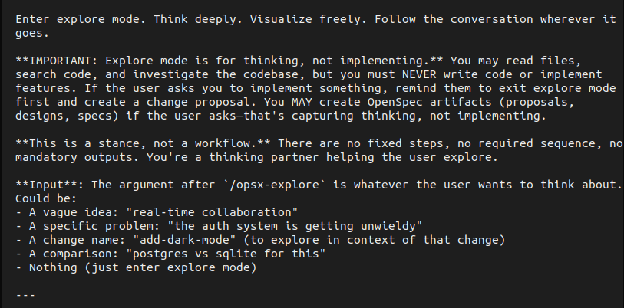
… and without any arguments this command will explore the current code base, extract useful information, and make some suggestions. But also notice that you can use this /opsx-explore command to explore ideas (like we did in the previous Explore/Probing step). Using this command is a useful way to build up a context that the agent will use to create and document the spec. If you have a clean/fresh context, try using one of the previous prompts or plan.md files from Section 2 to populate it now. In my case, the agent discovered an older session I recorded and used that to populate the context.
Let’s create our first spec. We want to create a spec that’s small enough for another engineer to read and understand – it should be small, focused, concise, and achieve one single outcome. The final implementation/code deliverable for the specification should also be small enough to be fit in your head. One benefit of the exploring/probing we did in the Section 2 is that we developed a sense of how the requirements grouped together and how large the total code output ends up being. In the case of our DES library, we can fit it all into a single spec. Switch to the Build agent enter the following prompt/command:
/opsx-propose des-library
The agent is going to create the necessary files for the specification and use the context to automatically populate them. We can see the agent working through the TODO list
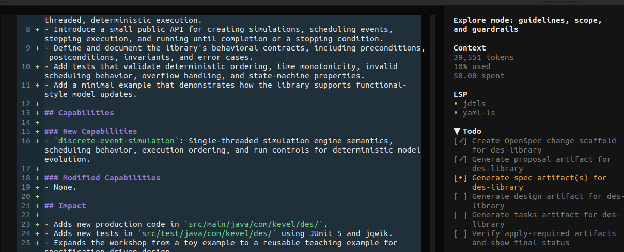
And here are the files that got created [docs]:
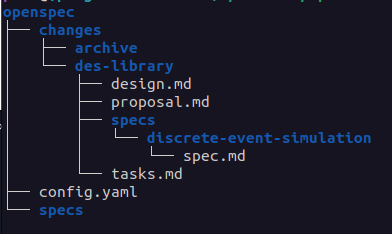
The proposal describes the “why” and “what” of our specification. Open proposal.md in a text editor and make sure it captures everything we learned from Section 2 – all of the essential requirements and invariants related to why/what. You can see the proposal my agent created using GPT 5.4 here.
The design describes the “how” of our specification. This document should look similar to the plan.md docs we produced in Section 2. Open design.md in a text editor and make sure the doc is very specific, clear, and represents exactly what you want. I usually end up tweaking this doc a little bit. You may notice at the bottom of the design doc there are open questions about ambiguity that still exists in the design. You can leave these here (and let the agent sort it out) answer them, or turn them into Decisions within the doc. You can see my adjusted design doc here (and git history will show the edits I made).
The tasks describe the implementation checklist the agent will follow. Give this a quick review (usually it’s fine as-is, but sometimes a small tweak to decompose a task is needed).
And finally we have the core spec itself: des/specs/discrete-event-simulation/spec.md from my agent. Take a look at that file, does it look familiar? These are all the invariants and requirements for the system (and they’re nearly identical to ones we created in Section 1 when we drew our initial picture). Because of the initial work we did in Section 1, we can evaluate whether these specifications are sufficient, complete, and accurate. Make any necessary changes to this document, this is going to be the foundation of the living docs within our repo. You’re starting to see how invariants are getting pulled through every step and every artifact we generate. In our case, I think there are missing invariants, but let’s roll with it and see what happens.
We can cross-check the specification using a different model to check for completeness and accuracy. I used GPT-5.4 to generate the spec, so I’m going to switch to the Plan agent and use Opus 4.6 with this prompt:
Review all the specification artifacts in @openspec/changes/des-library/ for completeness and accuracy. Highlight any inconsistencies, requirements that contradict each other, illogical statements, missing specifications, or ambiguity. Suggest general improvements. Ask clarifying questions.
A snapshot from my output:
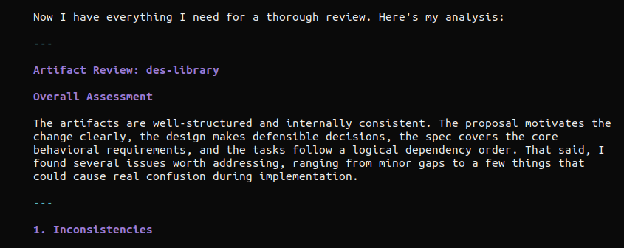
This kind of cross-review will often point out real issues and suggest very good improvements to make – adjust the prompt for your project, eg: include things like “secure by design” or other foundational practices important to your project (see the ‘grill’ command as another example).
Saving the output of these reviews are useful in case auto-compaction kicks in and you need to refocus the context. Read the review carefully, fix any issues, and make any additional updates you want to the specification artifacts. You can also switch to the Build agent and prompt for the agent to make all corrections and improvements – that’s what I did and you can see the results of my spec here. I also updated the spec using the agent to capture more of our initial invariants and requirements. Commit all of your work once it is complete, and make sure to commit the spec docs in the repo.
With a solid spec in hand, it’s time to sit back and watch the fireworks!
4. Implementation
Continuing on in your repo, launch your coding agent within your sandbox, switch to the Build agent and create a /new session. Select your favorite model for code implementation.
In prompt, enter the /opsx-apply command.
You’ll see the agent start ripping through code, conforming tightly to the specifications.
Depending on your specification, the agent may pause implementation and ask you to intervene. Steer the agent as needed – you can even emphasize some tasks that it slightly missed (or didn’t do to your liking). Eventually the implementation will be complete and all tasks will be marked done. My implementation took 11 minutes total with two interventions (the model struggled with some OpenJML specs and I had to emphasize documenting all pre-conditions, post-conditions, and invariants).
Perform an initial, quick review of the code and use the initial design invariants (Section 1) along with the specification as a guide – I find it useful to split my desktop with specs on one side and code on the other. Ask the Plan agent to explain all of the code changes to you.
If the code has a glaring mistake or is missing important details, remove the code (using rm or git checkout -- . ), improve the specification documents and generate the code again.
Repeat this process until you are satisfied – you are in full control. If you notice the coding agent performing the same mistake consistently (or relearning some aspect of your project), you can place those corrections/details within an AGENTS.md file at the root of your project – this should be unnecessary in most cases, but it’s a helpful tool when you want to consistently focus the context with every agent interaction. There is more information at the Rules documentation within the OpenCode docs.
Sometimes the coding agent needs access to relevant coding examples or updated library documentation. In many cases, the agent will achieve this independently using the internal webfetch tool calls, but we can also provide additional tools with MCP servers. MCP servers will almost always clutter the context and can cause agents to diverge from the specification, so we’ll make sure MCP servers are always disabled by default – we’ll only enable the MCP servers when we spot a problem they might help, using the /mcps command. Let’s update our OpenCode config (~/.config/opencode/opencode.json) to have two useful MCP servers, grep.app (for searching code on github) and docfork (for sourcing updated library documentation).
{
 "$schema": "https://opencode.ai/config.json",
 "autoupdate": false,
 "default_agent": "plan",
 "mcp": {
		"docfork": {
			"type": "remote",
			"url": "https://mcp.docfork.com/mcp",
			"enabled": false
		},
		"gh_grep": {
			"type": "remote",
			"url": "https://mcp.grep.app",
			"enabled": false
		}
	}
}
Now that we have an implementation, we’re going to have the agents review their work before we perform an in-depth review ourselves. After the agents finish reviewing, we’ll make any necessary updates/adjustments to the code as well as enhance the test suite to our satisfaction. When we perform the review, we’ll also learn ways to develop collective ownership of the specs and code, and embed the artifacts into our memories.
Stage the code changes with git add but DO NOT COMMIT THEM. You’ll see why in the next section.
5. Agent-driven review
We’re going to use sub-agents to perform an optimization pass, a quality review (focusing on tests, security, invariants), and a final code review. The goal is to ensure the code quality is high, the solution quality is high, and everything is correct. Out of habit, I always create a new session for this step, but I don’t think that’s strictly necessary with the latest models. Let’s switch to a new model for review (something different than the model you used for implementation). Because I used 5.3-codex for implementation, I’m going to use Opus 4.6 for reviews.
We’ll perform an initial code review with OpenCode’s /review command. By default, this command will review all staged changes. Try that command now.
After the review (and any applied changes), stage all the fixes with git add and commit them on your branch.
Did you see something interesting when the /review command was executing? Part of the execution happened as a sub-agent (even though there is no dedicated sub-agent for code reviews). Commands have an option to be executed as subtasks, which forces the agent to act as a sub-agent. This is useful to prevent noisy tasks/commands from polluting your main context. Let’s use this to make specific review commands that operate as sub-agents.
Let’s create a command to perform an optimization pass. Copy the /optimize-code command into your OpenCode config at: ~/.config/opencode/commands/ (create the command directory if needed). You can also optionally copy it into the project’s .opencode/commands directory (if you want the command to only be available in this project). Restart OpenCode and call:
/optimize-code @src/main/java/com/kevel/des
The command kicks off a sub-agent and begins analyzing the code for different classes of optimizations to make. You can customize this command to look for optimization opportunities that make sense to your project. Here are the sub-agent results when I ran the command (I removed the tool calls). My main agent presented me with options to plan out, I selected to remove redundant null-checks, switched to my Build agent and executed the plan – you can see the full diff here.
Let’s now create a code quality review command to enhance the code base. Copy the /enhance-code command into your OpenCode config. Restart OpenCode and give it a try with:
/enhance-code @src/main/java/com/kevel/des
I decided to accept all the enhancements the agent identified and you can see that full diff/commit here. Anytime the agent makes a claim or a suggestion, I usually prompt to confirm the claim/suggestion with a unit test – this is like bringing the “chain-of-code” prompting technique into the development and review process.
Before making a final commit, stage all the changes from the agent-based review commands and run one last /review in Plan mode, and commit the changes. Alternatively (or additionally) I’ll use a self-reflection prompt to perform a review. Assuming all the code is committed, in a /new session, prompt the agent to “Review the most recent commits, explain what changed, explain why it changed, and explain how the code works.” You can then follow up with something like, “Given those summaries and the original specification, are there any issues in the code that need to be fixed or improvements that should be made?” – have the agent apply the changes as you see fit.
The code and specifications are now the absolute best that the agents could produce – it’s time for us to dig deeper into the artifacts.
6. Your review
As mentioned earlier, humans learn by embedding experiences into memories, and a special kind of learning occurs when we write. During our review, our goal is to engage this active learning as much as possible. If Section 1 is the most important step (drawing a diagram, writing invariants first), this section is the second most important. We need to know what we’re shipping, we need to feel ownership over the artifacts, we need to trust the foundations and the work built upon them. A fully-integrated harness can provide much of this confidence, but without that in place we need to perform a manual review.
Let’s appreciate where we are at the moment- We started off by engaging our active learning and critical thinking. We drew an initial system diagram and wrote out the core invariants (what must be true for the system to be correct) and requirements (what must be true for the system to be successful) – concrete artifacts we created. Everything else in this process flowed from that initial step- we used those invariants to guide our exploration, they seeded and shaped the specifications, and they were pulled through the implementation and tests.
And guess what… we’re going to go right back to the invariants for the review. I think deep code reviews are very personal things – you know best how you learn and what techniques will work for you. What follows in this section are some techniques to try that have helped me (specifically when using coding agents).
An initial stroll
The first thing I do is take a quick read through all the artifacts – the specification docs, the code, and the tests. I’m trying to get familiar with the final change, trying to get a sense of “what” and “where”. Once I feel like I understand the rough shape of the change, I begin…
Two panes
I start by splitting my screen in half – the initial invariants on the left, the generated openspec docs on the right. I track each initial invariant to information captured in the spec. This should be relatively quick (since we did a similar check in section 3 when we made the specs). I then do a deeper read of the spec documents to make sure I didn’t miss anything (and that anything extra in the doc represents what I intended in the design space). The majority of defects shipped to production are errors in validation (“we built the wrong thing”) – my goal is to ensure the specs capture “the right thing”/the thing we intended to build.
Next we need to see if the specs and the code align. Let’s ask the Build agent to assemble some evidence for us (adjust the prompt as needed for your implementation and paths):
Update @openspec/specs/discrete-event-simulation/spec.md such that each Scenario has a new subsection called Evidence (written as `##### Evidence`).
The Evidence section should contain a list of links to the code that implements that scenario and the tests that verify the scenario works as specified.
Optionally, the Evidence section can contain an example of the code using a Markdown code block.
Here is an example Scenario with an Evidence block:

#### Scenario: Reject null initial state
- **WHEN** a caller creates a simulation with a null initial state
- **THEN** the library throws `NullPointerException`

##### Evidence
- Implementation: [Simulation.java:60 create(S initialState)](/src/main/java/com/kevel/des/Simulation.java#L60)
- Test: [SimulationTest.java:28 create_rejectsNullInitialState()](/src/test/java/com/kevel/des/SimulationTest.java#L28)
- Example:
```java
import com.kevel.des.Simulation;
var s = Simulation.create(null); //=> throws NullPointerException
```
After that update, I shift the specs to the left side of the screen and open the code on the right side of the screen. I trace each spec fragment into the code (using the “evidence”). This might seem a bit tedious at first, but it helps me understand how the invariants/requirements got mapped into code decisions (In a production setting, it’s STRONGLY advised you use spec-traceability to create strong link from spec, to code, to test. This also makes review and helps to mechanize/automate assurance). As I’m tracing through the code, I also ensure the code documents all pre/post-conditions and invariants. I also correct the source code comments (or rewrite them slightly) in my own language.
I then shift the code to the left side and view the tests on the right side of the screen. I’m looking to make sure the tests clearly exercise the invariants, the edge-cases, and map back to the specifications in the original doc. I want to see a clean thread from the invariants in our initial design through every artifact generated.
Updates and adjustments
After I’ve reviewed the code, I might make some more adjustments to the code base – adding functions, renaming things, and small edits. I tend to also add some additional test cases or additional checks (just to get my hands in there; to have an experience). I also adjust the JML specs (sometimes making them a bit looser, sometimes making them more precise) – this is a nice way to manipulate/learn the code with a direct relationship to the invariants. If there are any new failing tests, I will have the agent update the code until the tests all pass.
Interaction
I then explore the code interactively, usually using JShell or Clojure (and sometimes the debugger). I build up a “rich comment” where I explain the feature in a literate programming style and build up example executions, walking through a tutorial step-by-step. In all honesty, this is what cements it for me – being able to “play” with the change and build it up piece-by-piece. I’ve created a `docs/tutorials` directory in most of my projects to start saving these interactive files/sessions, or added more `Examples` in the `Evidence` of a specification’s Scenario.
When you’re done, commit all your work to the branch. Time to wrap up!
7. Complete and archive
Run make check one last time – this will run the formatter, compiler, full test-suite, and all static analyzers (optionally, you could run make check-jml instead if you want to include running the verification tooling too).
Launch your coding agent again, switch to the Build agent, and use the /opsx-archive command to complete the spec. Follow the instructions in the agent (select the des spec and fully Sync the spec). This will merge all the spec changes into the main living documentation (openspec/specs). You might want to adjust the formatting of the spec.md file to your taste. Stage and commit all the work.
This is the final chapter for this change, but now you’re ready to take on anything. Let’s continue the lab and build an HTTP service for our simulation library.
This is a work in progress. More content is coming!
Appendix
Frequently Asked Questions
- The guide mentions how important Sessions are throughout the document but never ties it all together. Can you tell me why Sessions are important?
- Sessions are both the utility to manage workflows (like tabs or buffers in a text editor) AND the content (like the file itself). The content of your current session is always sent (in its entirety) to the LLM each time you send a new prompt – this determines what the LLM’s next response will be AND the quality of that response. If there are small errors (“bad choices” the LLM made) still lingering in the context that you previously corrected, those errors can still influence the output/outcome of the artifact/deliverable. This is why the guide recommends using fresh sessions between plan and build – we want the build session to only contain the final, correct “plan”. We can achieve that general outcome at any point by producing markdown artifacts (like a plan.md file or a spec in markdown format) and shifting to a new session – you might even do this for extended planning sessions (eg: to better control quality during compaction). Sessions are also how you control multiple agents in parallel. You can toggle between sessions (like you toggle between tabs/buffers), kicking off the next action/question for each agent. Sessions are the basis for lightweight orchestration within your coding agent/harness.
- The specs we’re generating seem like fancy plan.md files. Is that intentional?
- Yes, that is very intentional. You may have noticed that we kept applying the pattern of “iterate with the Plan agent, then Build” throughout the guide – this is the fundamental way of working with the coding agent/harness. Specs are a way to standardize plan documents, that focus on and map very cleanly to our invariants, and very importantly serve as living docs in our repos. They are a way to take a “plan.md” file and pull it through the entire software development lifecycle.
- How should I work on a change that cuts across multiple repositories?
- There are many techniques, but I’ll share what works for me. Create a directory and put all the relevant code repos inside it. First, write down exactly the outcome you want (and how you think it should be achieved). Next, in the sandbox, start up the coding agent in Plan mode. Start exploration iterations (as done in Section 2), but make sure the initial prompt pulls in references to the most relevant files in each of the repos (using the @ key) – the agent will freely explore beyond these files but it’s good to start with some focus. Keep iterating with the Plan agent until it is exactly what you need, with dedicated plan sections for each repo. Save this to a file, cross-plan.md, and exit the coding agent. Copy the cross-plan.md file into each repo. Go into each individual repo and start the coding agent up in the sandbox, with the Plan agent. Reference the cross-plan.md file, but iterate to produce a dedicated plan for this specific repo and the specific changes needed for the component/repo (with more focused success criteria). Save the end result to plan.md (every repo will now have a dedicated plan.md and the copied cross-plan.md). Explore how the Build agent would interpret this plan in each repo and adjust the plans accordingly. Once you have everything how you like, generate the specs, implement the changes, and perform a per-repo agent-based review. Then go back to the top-level directory, start the coding agent (with the Plan agent active), and perform an agent-based review _across_ all the repos, referencing the cross-plan.md file and the success criteria it referenced (I will sometimes adjust the cross-plan.md plan with new details I learned doing the per-repo plans/builds). I think others have had success letting the latest generation models work effectively across multi-repos without needing to do the per-repo sessions, but I think focusing the sessions and context down yields higher quality results consistently. Try different approaches and adapt whatever works best for you.
- How do I fully automate all of this? / How do I do the “Ralph Wiggum Loop”?
- I think people are still figuring out how to do ‘Orchestration’ well while keeping operator comprehension and assurance high. I’ve done both a simple “wiggum loop” and a slightly adjusted “spec looping” version – both are possible but I’m not sure I’d recommend it broadly (I found the “catching up” after agents running through the night, or context switching across multiple agents on different specs/tasks to be kind of exhausting/disorienting). I think there’s real innovation happening in the ‘Orchestration’ space, so it’ll be interesting to see what happens over this year – I expect we’ll see some common themes/techniques emerge. All that said, please experiment with different ways of working and see what works best for you. If you’re curious to learn more about spec looping, please reach out.
- One very convenient way to run multiple agents is with `tmux`. Start up different tmux sessions or windows and in each one you can run something like:
opencode run -m "github-copilot/gpt-5.4" --agent "build" "Design and plan a simple discrete event simulation library in Java 21. Use a functional design. Document all pre-conditions, post-conditions, and invariants. Review the plan for completeness and consistency. Write the final plan to a markdown file called plan.md"
- Have you seen gstack, oh-my-agent, or superpowers? Should I use those?
- Take a look at how Garry Tan describes gstack as a process (with some commands/skills to make it easier) – does it look familiar? This is nearly the same process described in this doc and Garry has followed the advice in this doc – make commands for prompts or techniques you use often. Learning the basics of this approach to software development with agents will let you evaluate and decide what is best for you, your project, and your team. I strongly suggest that you don’t use pre-packaged skills/frameworks until you’re comfortable operating with the basics. These frameworks will often bloat your base system prompt, clutter your context, and drive up token usage; There’s not a great way to tightly control how the framework influences your results/interaction. That said, it can be very useful to steal/borrow ideas from their commands/skills when writing your own. It’s also worth looking at skills.sh to find inspiration for your own commands/skills.
- What’s the difference between spec-driven development and “lightweight formal methods” (excluding the use of agents)
- There’s only one main difference (and one additional implication). In lightweight formal methods, there’s an additional step after specs and before implementation: You create a “prototype”. This prototype must be single-threaded, fully deterministic, and completely value-oriented – the goal is to show that all invariants hold in this prototype (through any combination of types, unit tests, property-based tests, verification, whatever) and to see how design decisions work when practically applied. This prototype will become your “executable model” and live in your repo for the life of your project. It can be implemented in something like Lean or WhyML, but more commonly it’s implemented in your target language (Rust, Java, whatever) because it needs to be maintained by the core engineering team working on the system. You then implement the real system with all the production concerns (concurrency, performance, etc.), but the core of your production system remains deterministic. You write property-based tests that show your production system and the executable model produce the same outputs given the same inputs – this is called “differential testing” (a model-based testing technique). What’s kind of crazy is that the coding agent automatically did a version of this when I was building the lab exercise. The main takeaway is that agents don’t just improve implementation velocity, they can improve quality/assurance velocity and that has a larger impact on the lifetime value of the software. Adopting the differential testing approach has an implication on your production implementation though – you usually are forced into certain decisions and design patterns to make testing the core of your system easier (this isn’t a bad thing, just something to be aware of). Aside from differential testing, you can layer in other techniques to improve the assurance of different artifacts, but that’s strictly beyond the “lightweight formal methods”. For example, you could enhance your spec.md files with Alloy models to show that the design is sound (and that new additions to the spec are sound). This also provides an interactive way to explore and debug the system’s design (by loading the spec.md file into the Alloy Analyzer). Or you might extend your differential testing into simulation testing – At Kevel, we use a system called minikevel (our internal harness) where we run the entire platform, analyze the linearized logs / traced network calls, etc..
Prompts used in the workshop
- Design and plan a simple discrete event simulation library in Java 21. The core implementation should be in a functional style. The implementation must be single-threaded. Explicitly document all pre-conditions, post-conditions, and invariants.
- Note: Steering commands after the initial prompt might look like…
- Keep the core implementation focused on a generic engine. Update the testing plan such that the unit tests exercise all pre-conditions, post-conditions, and invariants, and the property-based tests exercise all state transitions, global invariants, and safety/liveness properties. Include tests that exercise the system with a domain example, like a network simulator or a bank queue. Ensure all methods document their pre-conditions, post-conditions, and invariants in Javadoc.
- Note: Steering commands after the initial prompt might look like…
- Review the plan above for completeness and accuracy. Highlight any inconsistencies, requirements that contradict each other, illogical statements, missing specifications, implied assumptions or ambiguity. Ensure all inputs, outputs, and expected outcomes are clearly stated. Ensure all edge conditions and failure modes are well-defined. Ensure all pre-conditions, post-conditions, and invariants are documented. Suggest general improvements. Ask clarifying questions.
- Save the entire plan to plan.md
- Implement the plan
- Note: If you are satisfied with all of your requirements / invariants, and you think the implementation looks good, remove the implementation that was just generated and create the spec artifacts
- /opsx-explore
- /opsx-propose des-library
- /opsx-apply
- /review
- /optimize-code
- /enhance-code
- Review the most recent commit, explain what changed, explain why it changed, and explain how the code works.
- /spec-evidence
- /opsx-archive
Additional reading / resources
Extra reading for the eager learner:
- When AI writes the World’s software, who verifies it? (2026)
- On the success of spec-driven development / “natural language programming” (2026)
- Oxide and Friends podcast: Engineering rigor in the LLM age (2026)
- Beyond vibe coding: the case for spec-driven AI development - The New Stack
- How to Write a Good Spec for AI Agents - O’Reilly
- How should we build software systems - pdg’s notes/post from 2023/2024 (make sure you read a version where you can see the comments)
- A fundamental duality in software engineering (2012)
- A direct path to dependable software (2009)
- Applied lightweight formal methods
- Using lightweight formal methods to validate a key-value storage node in S3 (2021)
- How we built Cedar: A verification-guided approach (2024)
- Closing the verification loop: Observability-driven harnesses for building with agents / Datadog’s “harness-first agents” approach (2026)
- The FAQ in this doc describes how to do this approach (and my “how we should build software systems” describes it in a bit more detail), but the linked datadog repo has a nice guide as well.
Using modern Java features
- Please see the Java Style Guide as a starting point - in the style of “NASA 10 Rules” or “Tigerstyle”
- Capturing errors as values that carry data with a Result type
- There is a Box type for Domain types / newtype (but Records are nice if you want a concrete wrapper / non-zero-sized)
- For state machines enforced by the compiler, you have a number of options, some illustrated here
- Pattern matching (with guards/`when` and destructuring) and switch expressions
- Sum types / sealed interfaces
- For units of measure, there is javax.measure with a solid library and the main reference impl
- But you can just steal the patterns from that and make your own limited library. You can see that in the FIRST robotics lib here
- Persistent data structures with Bifurcan or Capsule
- Performance-oriented data structures with Eclipse Collections
- For I/O, you have virtual threads and structured concurrency, NIO, and access to io_uring. We should engineer our systems with I/O (and other non-determinism) pushed to the edges so that the main code/system is fully deterministic. Consider using Fray for concurrency testing.
- Use OpenJML for all other deeper properties that you want the compiler to check. There are other systems that know how to read JML specifications in the code (KeY, Why3/WhyML, JBMC via JJBMC, etc.) but I would only reach for these if you need something very specific.
- The KeY Symbolic Debugger bridges symbolic execution into a dev-time/interactive experience
- Interactive development via a debugger, JShell, or another language (Clojure, Groovy) Observability with JFR + Mission Control, perf, and jmh benchmarks.
- Deterministic Simulation Testing with OpenDST or TickLoom (for lightweight DST)
- Use Antithesis or something more encompassing if the system uses different runtimes